News
- sales sales on "whats in your horses mouth?" ~ article by amy mclean
- sales sales on "whats in your horses mouth?" ~ article by amy mclean
- debbie on "whats in your horses mouth?" ~ article by amy mclean
- kent taylor on "whats in your horses mouth?" ~ article by amy mclean
- red bottoms shoes for women on welcome to our new blog!
Steel Buckles - Tom's Newest Project
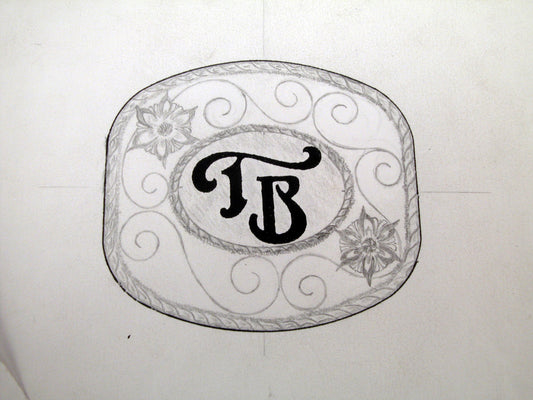
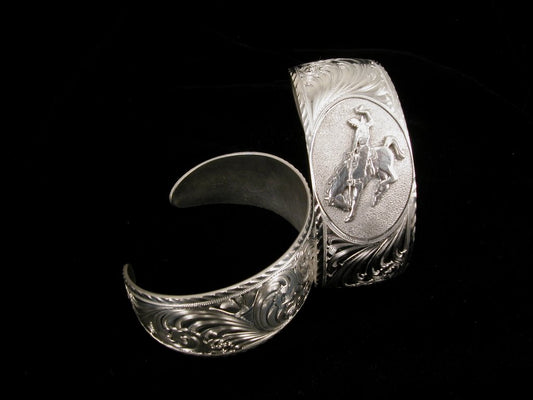
Steel Buckles - Tom's Newest Project In 2012 Lyle Lovett approached Tom about making a very unique buckle for his girlfriend April. Tom took this challenge to heart and developed a steel buckle he could tie into the distinctive look of his bits and spurs. He played with different shapes, finishes, and overlay concepts and came up with a squared buckle in his signature brown finish featuring his stainless dots in a progressively smaller corner orientation. Lyle further customized the buckle with a personal message stamped on the backside and presented it to a very happy April. Since then, Tom has built different orientations of this steel buckle concept for several customers including a guest ranch. This blog is the step by step walk through of the process it takes to complete these beautiful buckles. Please note that these are broad steps that hold many small steps within. We hope you enjoy it as much as we did! Step one: The name, logo, or initials are determined. Step two: The overlay is hand cut from sterling silver or alternatively chosen material. Step three: The back of the buckle is welded as per the fastening preference. Step four: Embellishments (dots, etc.) are welded...
Read MoreSteel Buckles - Tom's Newest Project
Steel Buckles - Tom's Newest Project In 2012 Lyle Lovett approached Tom about making a very unique buckle for his girlfriend April. Tom took this challenge to heart and developed a steel buckle he could tie into the distinctive look of his bits and spurs. He played with different shapes, finishes, and overlay concepts and came up with a squared buckle in his signature brown finish featuring his stainless dots in a progressively smaller corner orientation. Lyle further customized the buckle with a personal message stamped on the backside and presented it to a very happy April. Since then, Tom has built different orientations of this steel buckle concept for several customers including a guest ranch. This blog is the step by step walk through of the process it takes to complete these beautiful buckles. Please note that these are broad steps that hold many small steps within. We hope you enjoy it as much as we did! Step one: The name, logo, or initials are determined. Step two: The overlay is hand cut from sterling silver or alternatively chosen material. Step three: The back of the buckle is welded as per the fastening preference. Step four: Embellishments (dots, etc.) are welded...
Read MoreSOFT HANDS
We love this article on riding with soft hands by trainer Jane Savoie on horsetalk.co.nz. "Riding with soft hands is an awesome goal, and your horse will thank you for it. In this tip, I’m going to give you two physical and also some mental exercises. Here are the physical exercises. 1. Tie two reins or ropes or even two pieces of baling twine to a sturdy fence. Hold the ropes as if they’re reins. Take up a contact of at least 10 pounds in each hand. Then, adjust the weight of the reins by softening your arms. Go from 10 pounds to 5 pounds back to 10 pounds and then to 2 pounds. Once you get this feeling of adjusting the weight of the reins, you can transfer the same technique to your riding when you feel yourself getting too strong. 2. The next exercise is a progressive relaxation exercise. Progressive relaxation means that the more tightly you hold a muscle, the more deeply it relaxes when you let go. So let’s tire out those strong hands. With your fingers curled around the reins, clench your hands into fists. Increase the tension until your hands are shaking. Then relax...
Read MoreBit Basics
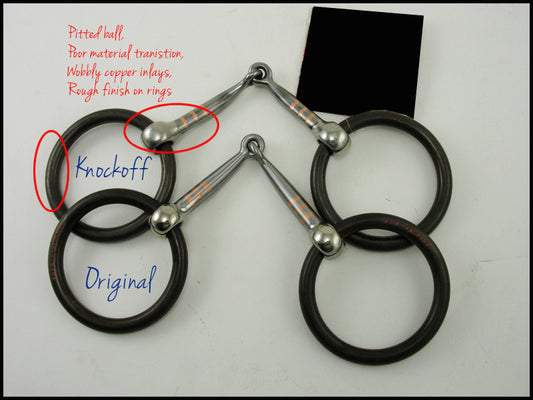
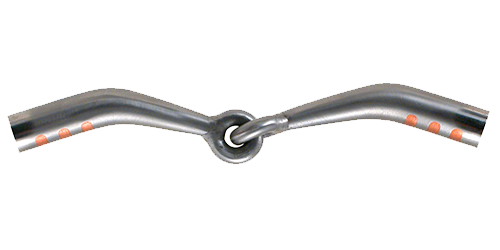
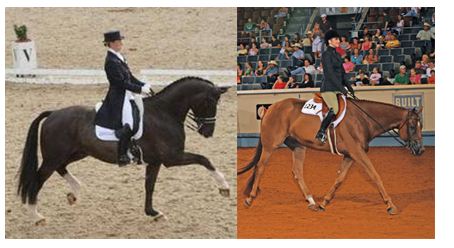
Understanding the importance of materials in the mouthpiece of your bits is a huge key to how successful you will be at getting the most out of your horse's performance. There are many options for bits and not all horses like the same mouthpiece. Granted, sometimes it is not the bit but whose hands the bit is in that can ultimately determine if the horse is responsive or accepting. A good sign that a horse has accepted its bit is the way he carries his head. A horse that is soft or accepting of the bit is flexing at the poll, relaxed at the jaw, and not mouthing the bit. Some common behaviors for not accepting the bit include head-tossing, chewing, or gaping mouth. If one sees their horse displaying such behavior, it is always a good idea to have your horse’s teeth checked as well as checking to see if there are sharp edges or pinching. Another major sign to look for is if the horse is producing saliva. Increased saliva production will increase sensitivity and allow the bit to properly roll and rotate in the horse’s mouth. Various metals used to make mouthpieces, such as steel (sometimes referred...
Read MoreBit Basics
Understanding the importance of materials in the mouthpiece of your bits is a huge key to how successful you will be at getting the most out of your horse's performance. There are many options for bits and not all horses like the same mouthpiece. Granted, sometimes it is not the bit but whose hands the bit is in that can ultimately determine if the horse is responsive or accepting. A good sign that a horse has accepted its bit is the way he carries his head. A horse that is soft or accepting of the bit is flexing at the poll, relaxed at the jaw, and not mouthing the bit. Some common behaviors for not accepting the bit include head-tossing, chewing, or gaping mouth. If one sees their horse displaying such behavior, it is always a good idea to have your horse’s teeth checked as well as checking to see if there are sharp edges or pinching. Another major sign to look for is if the horse is producing saliva. Increased saliva production will increase sensitivity and allow the bit to properly roll and rotate in the horse’s mouth. Various metals used to make mouthpieces, such as steel (sometimes referred...
Read More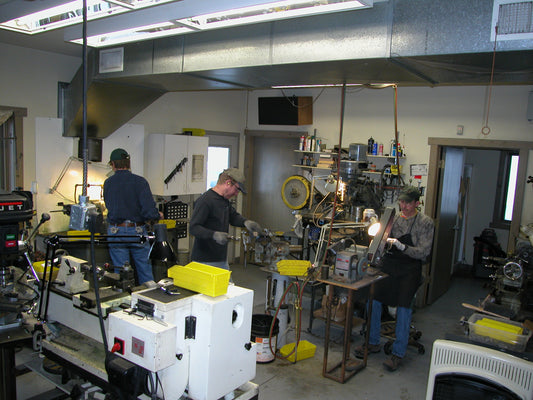
IF IT AIN'T BROKE...
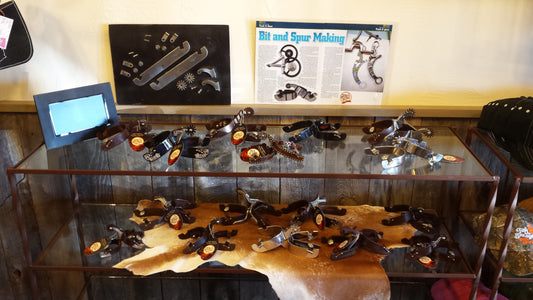
IF IT AIN'T BROKE... don't replace it! Each bit and spur is hand build through the initial machining down to the hand engraved initials. Through the years Tom has acquired many pieces of equipment to help make the bit and spur building process more efficient - for bending, drilling, and cutting the raw metal. Each piece of equipment has lived a little life before making it to our shop, and is put through rigorous use as it is manned by Tom, Sam, Justin, and Ryan. Here you can see a glimpse of the larger machines in the main fabrication room. This is where the the stock material coming in starts to take shape as a bit or spur. There are exceptions - machines that were purchased new. Toms welder, bought in 1973 to start his welding business, was one of those items. It finally broke down and repair is not possible. It was a bittersweet parting for Tom. He bought the helmet the same day, but it still has a lot of miles left on it. New equipment is also brought in if the technology is able to add value to you, our customers. An example of this is our...
Read MoreIF IT AIN'T BROKE...
IF IT AIN'T BROKE... don't replace it! Each bit and spur is hand build through the initial machining down to the hand engraved initials. Through the years Tom has acquired many pieces of equipment to help make the bit and spur building process more efficient - for bending, drilling, and cutting the raw metal. Each piece of equipment has lived a little life before making it to our shop, and is put through rigorous use as it is manned by Tom, Sam, Justin, and Ryan. Here you can see a glimpse of the larger machines in the main fabrication room. This is where the the stock material coming in starts to take shape as a bit or spur. There are exceptions - machines that were purchased new. Toms welder, bought in 1973 to start his welding business, was one of those items. It finally broke down and repair is not possible. It was a bittersweet parting for Tom. He bought the helmet the same day, but it still has a lot of miles left on it. New equipment is also brought in if the technology is able to add value to you, our customers. An example of this is our...
Read MoreARE YOU A HORSE PERSON?
ARE YOU A HORSE PERSON? We love this great list from Pro Equine Grooms and want to share it with you here. "-You speak horse. You understand how their brains work, how to read their body language, and how to influence and train their behavior in positive ways. Giant, thick books on the topic have been written, you have memorized them all, and you still learn each and every day about how horses communicate by observing and interacting with horses. -You also speak human. All this horse knowledge is useless if you can’t “play nice” with your boss, your co-workers, the barn clients. You will also recognize your own needs, and the needs of those around you. Yes, “horses come first” but at some point, you need to sit your butt down and eat a sandwich and take care of yourself. No horse will die if you wait 30 minutes to clean stalls or do some turnouts. -Spend time focusing on the basics, the simple things. The tricks will follow. This goes for hand work and under saddle work. If you have a horse that dances in the cross ties or likes to be a jerk when you are leading him,...
Read More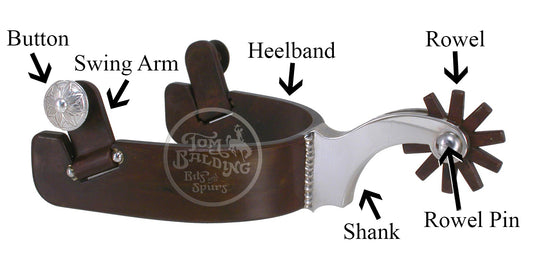
Anatomy of a spur
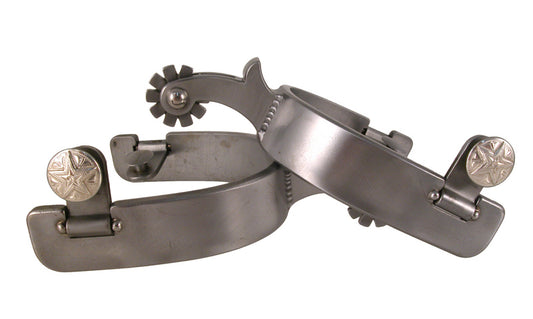
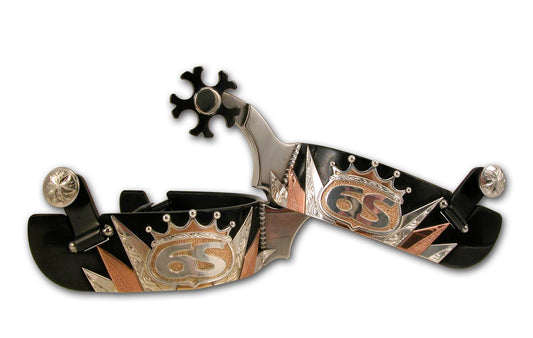
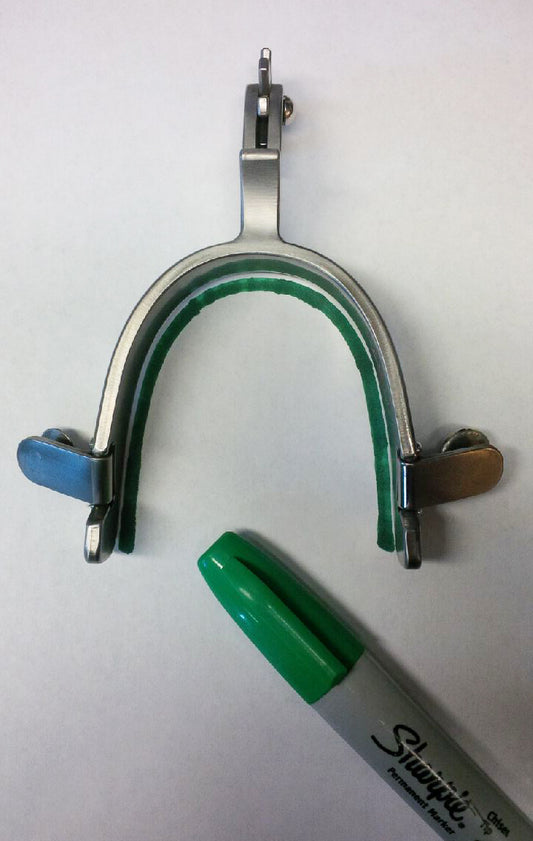
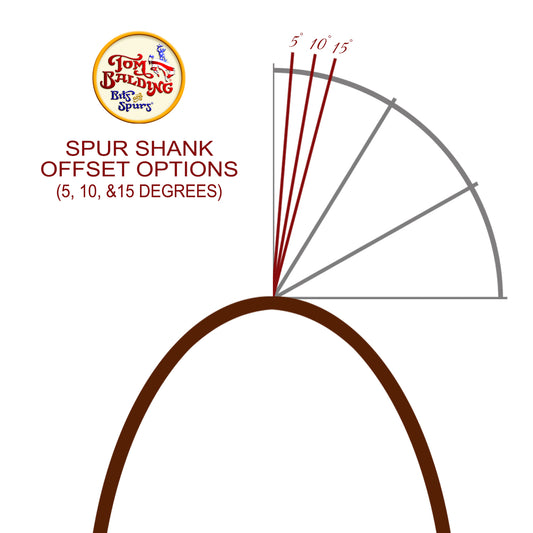
Button:Â This is the part the slips into the spur straps to hold them on the spur. Swing Arm:Â The swing arm hold the button to the heelband and, if hinged, allows for some movement. Bronc spurs typically have the spur bottom directly on the heelband and do not have a swing arm. Heelband:Â The heelband is the part the slides onto the back of your boot. It is sized to fit the rider and can be made of different weighted material for different preferences. Overlays can be placed on this part of the spur to dress it up. Other terms for this part of the spur are 'Yoke' or 'Branch'. Shank:Â The shank is the contact between the heelband and rowel. It is offered in many different lengths and angles to ensure the rider is able to use their spurs to the best of their ability. Overlays are also often placed on this part of the spurs. This part is also sometimes referred to as the 'Neck' of the spur. Rowel Pin:Â As the name suggests, this is the pin that holds the rowel onto the shank. It can be attached in many ways with the most common being to weld the end of...
Read MoreAnatomy of a spur
Button:Â This is the part the slips into the spur straps to hold them on the spur. Swing Arm:Â The swing arm hold the button to the heelband and, if hinged, allows for some movement. Bronc spurs typically have the spur bottom directly on the heelband and do not have a swing arm. Heelband:Â The heelband is the part the slides onto the back of your boot. It is sized to fit the rider and can be made of different weighted material for different preferences. Overlays can be placed on this part of the spur to dress it up. Other terms for this part of the spur are 'Yoke' or 'Branch'. Shank:Â The shank is the contact between the heelband and rowel. It is offered in many different lengths and angles to ensure the rider is able to use their spurs to the best of their ability. Overlays are also often placed on this part of the spurs. This part is also sometimes referred to as the 'Neck' of the spur. Rowel Pin:Â As the name suggests, this is the pin that holds the rowel onto the shank. It can be attached in many ways with the most common being to weld the end of...
Read MoreA History of Sheridan WYO Rodeo
One of the biggest events to hit Sheridan every year is the Sheridan WYO Rodeo! The upcoming dates are, July 11th - 17th, 2016. A History, by Tom Ringley (sited from sheridanwyorodeo.com) In 1931, the small town of Sheridan, Wyoming, was so quiet you could shoot a shotgun down Main Street and have no fear of injuring anyone. A group of local citizens wanted to do something about the situation and decided to put on a rodeo. They set their sights high and organized a first-class professional rodeo on a par with other professional rodeos like the Cheyenne Frontier Days in Cheyenne, Wyoming. The committee started out from ground zero and had a huge challenge. Not only did the rodeo committee have to organize the rodeo from scratch, but they also had to prepare the county fairgrounds facility that lacked the necessary amenities for a large professional rodeo. They sold capital stock to finance the construction of additional seating, corrals, pens, and bucking chutes among other things. To publicize the event, E. W. Bill Gollings was commissioned to paint a picture for the first Sheridan-Wyo-Rodeo poster. The entire community and downtown merchants helped support the efforts of the rodeo committee to...
Read MoreA Bit of Advice from Gina Miles
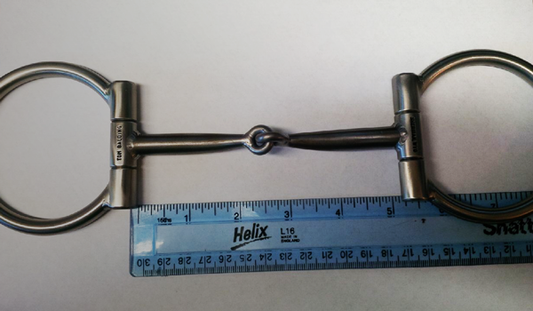
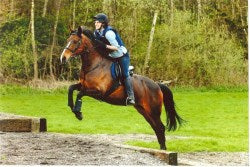
A Bit of Advice from Gina Miles Olympic three-day eventer Gina Miles shares 10 tips for selecting an appropriate bit. By Holly Caccamise | December 2013 - This article originally appeared in the August 2011 issue of Horse Illustrated. Illustrated. Click here to subscribe. Selecting the correct bit is one of the most important parts of training your horse and bringing out his best performance. Here, Gina Miles, the 2008 Olympic individual silver medalist in three-day eventing, shares advice to help you navigate the many bits out there. Miles uses the following guidelines when deciding on a bit for a particular horse-and-rider combination. Use the simplest bit for the job. "Whenever I have a new horse in the barn or a new student, I first want to see how they go in a very basic double-jointed loose-ring snaffle, a says Miles. Always remember to go back to the basics. If you have been using other bits during show season, try going back to the basic double-jointed snaffle during a break from competition or over the winter. "It’s always a good idea to take a step back and see if your training has been effective and produced a more rideable, responsive horse” says Miles. Use enough noseband to...
Read MoreA Bit of Advice from Gina Miles
A Bit of Advice from Gina Miles Olympic three-day eventer Gina Miles shares 10 tips for selecting an appropriate bit. By Holly Caccamise | December 2013 - This article originally appeared in the August 2011 issue of Horse Illustrated. Illustrated. Click here to subscribe. Selecting the correct bit is one of the most important parts of training your horse and bringing out his best performance. Here, Gina Miles, the 2008 Olympic individual silver medalist in three-day eventing, shares advice to help you navigate the many bits out there. Miles uses the following guidelines when deciding on a bit for a particular horse-and-rider combination. Use the simplest bit for the job. "Whenever I have a new horse in the barn or a new student, I first want to see how they go in a very basic double-jointed loose-ring snaffle, a says Miles. Always remember to go back to the basics. If you have been using other bits during show season, try going back to the basic double-jointed snaffle during a break from competition or over the winter. "It’s always a good idea to take a step back and see if your training has been effective and produced a more rideable, responsive horse” says Miles. Use enough noseband to...
Read More